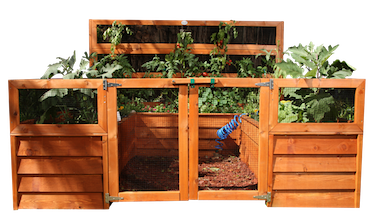
My relationship with Backyard Discovery is in it’s second year now. Time flies! I’m thrilled to tell you that they recently sent me their Backyard Botanical Oasis Garden…
Up until a few days ago, I was clueless about gardening. Just plant some seeds, water them, and ta-dah! RIGHT? I had so much to learn.
- What zone I live in.
- What plants make good companions. (For each other, not me. Though don’t be surprised if I start talking to mine.)
- Which plants are best suited for cool weather and which ones thrive in the heat.
- Which plants need lots of sun, and which ones prefer a little shade.
- What to add to the soil. (You mean I can’t just use regular ol’ dirt?)
- How much to water. (Not as much as I thought.)
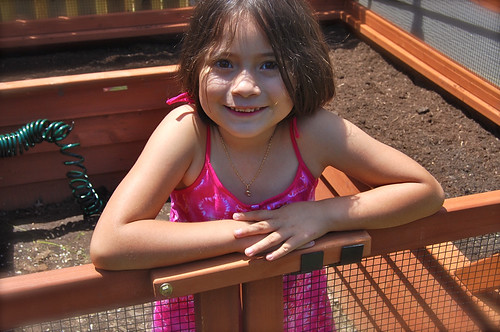
 The Oasis garden is a beautiful self-contained backyard garden. Constructed from cedar, it compliments our existing playset perfectly. It has a raised bed and is surrounded by trellises, to allow the vine veggies to stretch out and the pests to STAY out! A soaker hose that’s connected to a timer allows for automatic watering. This will be a lifesaver this summer, when we’re out of town for a few weeks!
What are the benefits of a raised bed?
- Easier to maintain, since it’s accessible on all sides.
- Less bending over or getting down on your knees to take care of your crops (perfect if you have back pain, like me!)
- Good drainage because soil is elevated and not compacted.
- Get more plants per square foot, since you don’t have to walk on the bed.
- Perfect for small yards, as you can find a garden customized to the size you need.
- Easier to keep pests out, as I mentioned above. Less weeds, too.
- A longer growing season because the soil is warmer than the ground.
- Allows you to use whatever kind of soil mixture you like!
That’s all that I can think of for now, but there may be more benefits (and even some disadvantages) to growing a vegetable garden in a raised bed that I’ll discover over time. Speaking of time…
Since I’m getting a late start, I was afraid that maybe I wouldn’t be able to get too much out of the garden this year. After doing some reading, I was happy to discover that I was totally WRONG about that! I didn’t even have to check out any books or buy “Vegetable Gardening for Dummies.” My local nursery’s website has a wealth of information that applies to gardening in my area, and I read every post about the Oasis garden that I could find at Backyard Discovery’s blog. Watched their YouTube videos, too. SO helpful! I learned a ton.
I found out that living in the Mid-Atlantic region, I’m fortunate to be able to grow vegetables in three seasons. I missed the first – the cool spring months – but am right on time for the plants that thrive in the hot summer heat. Then in late July and August, I can start planting the cool season vegetables that will be ready to harvest in the early fall!
Construction of the garden
Before we could even start building the garden, the ground had to be leveled, which wasn’t easy since it’s rained every day this month and the ground was a soggy, muddy mess. Once the ground was done (weekend before last), the construction could start.
Deciding where to put the garden was tough. It needed to be a place that gets at least 6 hours of sun, preferably in the morning. It couldn’t be too far from the water supply, as the hose needs to reach it. And not too far from the back door, as I’m more likely to neglect it if it’s not easily accessible.
After going back and forth between a couple of spots, I finally decided on the space between our shed and the fence. It gets lots of sun from 9am until around 3 in the afternoon, and with the garden surrounded on three sides, it’ll be protected from wind. The playset is maybe 35 feet away, so ideally, this summer I’ll be “playing” in my garden while the girls swing and slide nearby!
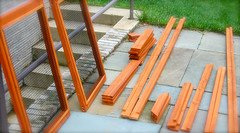
The instructions say it takes two “moderately-skilled” people 6-8 hours to put the garden together. It took one of my husband’s employees a week, in between work and rainfalls. It would have been faster if I was able to help, but as I mentioned in a previous post, I hurt my back and couldn’t do too much bending or lifting. I basically labeled and organized the wood and screws, and did a lot of bossing around, because I’m good at that, bad back or not. 😉
On Sunday, the last of the soil was put in the garden, and I planted a few things yesterday – all the transplants. I waited until this morning to do the seeding, as I was afraid yesterday’s rain would wash away the seeds!
What did I plant?
I want an edible garden so I had to think about what I enjoy cooking, what we eat the most, and honestly, what would save me the most money at the grocery store! Keeping in mind that I want easy-to-grow plants. I’m trying to involve the girls as much as possible, so I let them choose most of the seeds and plants, with a little coaxing and final approval from me, of course! Herbs were number one on my list, as I know they’re low maintenance and can make a BIG difference in my cooking. Basil, for example, I absolutely LOVE and often my grocery store doesn’t even have it! Or what they have looks bad. And costs $4 per (wilted) bunch. It’s so great that I can just tell Maya to go in the backyard and cut a few leaves for me!
I took a few minutes to prepare a garden layout. Just a basic sketch on a scrap of paper, pictured below; nothing set in stone. When deciding what will go where, I needed to consider the height of the plant, whether it needs support from the trellis, and the amount of space it will require. I’m a little iffy on the space factor. I mean, do certain types of plants really need to be 36″ apart? Well, too bad. I planted them closer together. I figure I can just move or thin them later on if necessary. Also, the left side of the garden gets a little less sun than the rest of the bed, so I had to plan accordingly.
SHOPPING LIST
I already had:
- Gardening gloves, a trowel, a hose, and a wheel barrow to move soil and plants to the garden.
I bought:
- A mixture of top soil and Miracle-Gro organic garden soil. 40 cubic feet, or around 1.5 cubic yards.
- Label sticks. Disney Princess sticks, to be precise. These sticks were expensive – $3 for six! – so to label the remaining plants, I’ll use popsicle sticks or have the girls find some pretty flat rocks that I can write on.
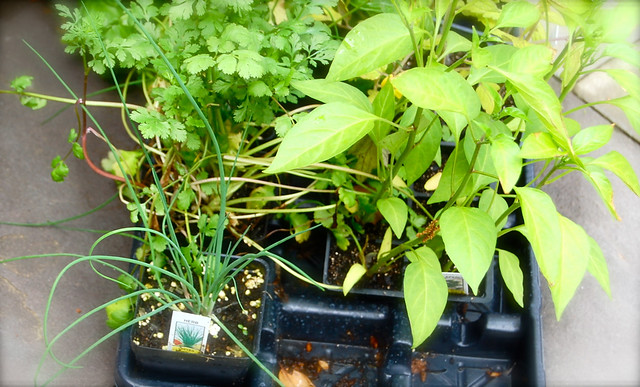
- Plants: Bell Pepper, Cucumber, Eggplant, Jalapeño, Basil, Chamomile, Chives, Cilantro, Parsley, Tomato, Strawberry, Marigolds
- Seeds: Beet, Carrot, Summer Squash, Onion, Swiss Chard, Dill, Rosemary, Thyme, Foxglove
20 different plants. That’s a lot to start with, isn’t it? I had a fairly loose shopping list, as I wasn’t sure what would be available at Home Depot. I couldn’t find celery or arugula seeds, for instance. Most of the transplants I bought from Maya’s elementary school plant sale, so the money went to a good cause, and seeds are fairly cheap. $1-2 per packet. I spent maybe 50 dollars total on plants. The soil, on the other hand… that was pricey. The Miracle-Gro brand isn’t cheap! We won’t have to buy that much soil again, though, so it’s only a one time expense.
Still need to buy:
- Gravel or mulch for the center of the garden, as it tends to get a little muddy in there when the water starts draining out. And maybe a PH meter.
____________________________________________________________________________
Day One: FINAL THOUGHTS
I still have to work out some issues with the water supply, but it’s not a big deal since I can just go outside every morning and water the garden myself for now. It’ll probably take me a couple of weeks to get the hang of it. How much to water at what time? How many times per day? I’ll have to do a little experimenting. I’m keeping a gardening journal, jotting down what I’m planting, what works and what doesn’t, and any other observations I may have.
I’m lucky to have a big backyard, but I know many people don’t have the space to plant a large vegetable garden. Time is another factor. That’s what’s so great about this product. Sure, it took a lot of work to put it together, but after all the planting is done, it’s pretty low maintenance. I’ll have to fertilize every month or so, winterize it later this year, and maybe coat the wood with sealant every couple of years, but that’s it, from what I can tell so far. Space-wise, it only takes up an 8″x8″ square in the corner of my yard, and looks really nice! Like it belongs there.
My first vegetable garden… I’m really excited about this new project!
Wish me luck!
I’ll post another update (and more photos) next week.
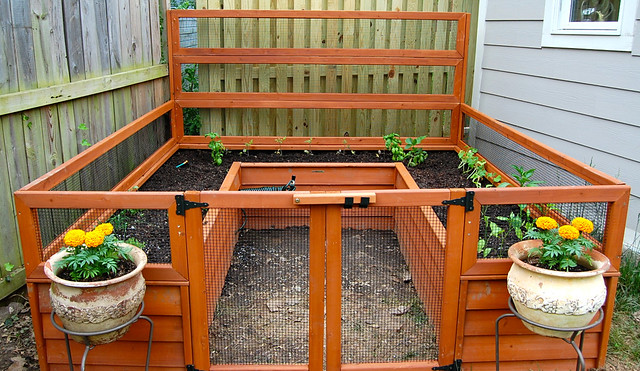
The Backyard Botanical Oasis Garden pictured above can be purchased on the Backyard Discovery website for $549, including shipping. The company provided me with the garden at no charge, but all other supplies I bought myself, and all opinions are my own.



I love these things! If they need any other testers feel free to send them my way LOL. We have a fairly small yard and not places to dig too much, so these above ground gardens would be great for us I think. Plus it might help keep the critters out who have eaten all of our seeds and now we have to replant.
Enjoy your garden this summer!
Robyn Wright of Robyn’s Online World´s last blog post ..Host a Kabob Party
That looks pretty awesome!
Ann Williams´s last blog post ..Winner- Whats in the Bible DVD
Hi Mariana. I’m waiting to see the posts that you describe all the experiences that you go through with the children when you work together in your garden. You have a lot to see and tell. Good luck 🙂
joe´s last blog post ..What lighting do you need to produce good crops of long-term
Looks good Mariana. I’m sure you’ll do fine. I can’t wait to see what your and fruits will look like. Enjoy!
Lisa´s last blog post ..EASY Memorial Day Recipes – Thanks to Food Network
I hope your garden flourishes! I just planted some herbs but within two days caterpillars started appearing out of nowhere and things aren’t looking too good right now 🙁 I hope that you won’t have to deal with that
leenanna´s last blog post ..security system with wireless cams